1.9 KiB
1.9 KiB
sidebar_position
| sidebar_position |
|---|
| 2 |
Texture Packer
Overview
This guide explains how to use a Texture Packer workflow to bundle multiple image assets into a single atlas texture file. This enhances performance by reducing draw calls and improving load times.
Configuration
Prepare Assets
Place finalized image assets into the Raw-Assets folder. These assets will be included in the texture atlas.
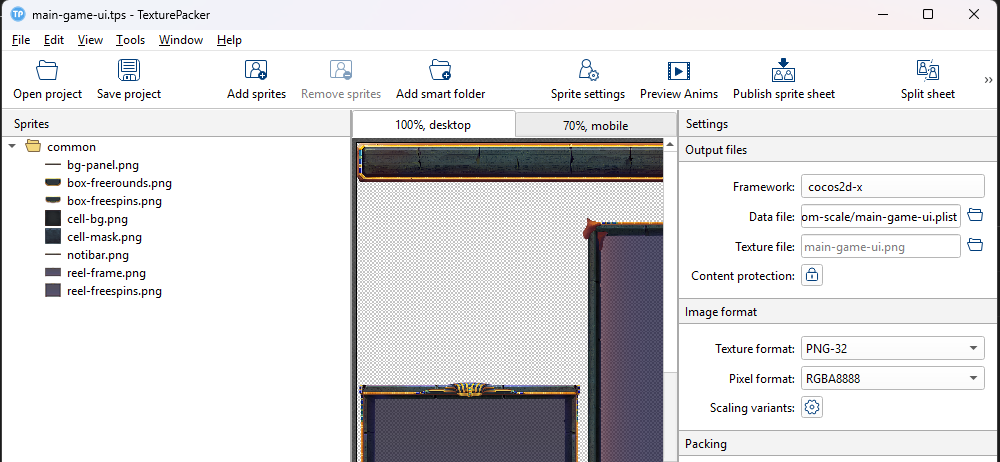
Create a New Sprite Sheet
- Launch TexturePacker
- Drag and drop your image assets
- Set Data Format to:
Cocos2d-xorCocos Creator
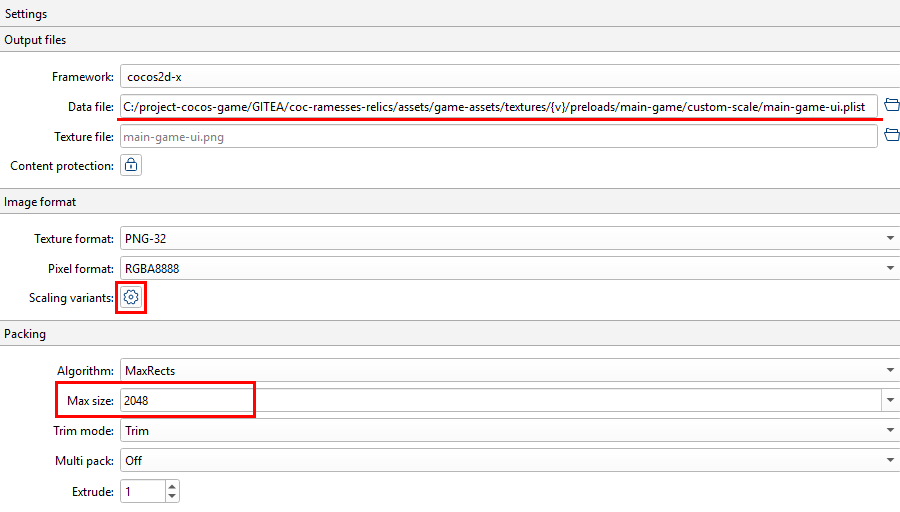
- Configure atlas settings such as:
- Max size
- Padding
- Trimming options
- Set output location
- Configure scaling variants (explained below)
Recommended Settings
| Option | Value |
|---|---|
| Trim Mode | Trim |
| Texture Format | PNG-32 |
| Max Size | 2048x2048 |
| Force Squared | Enabled |
| Export Multipack | Manual |
| Allow Rotation | Enabled |
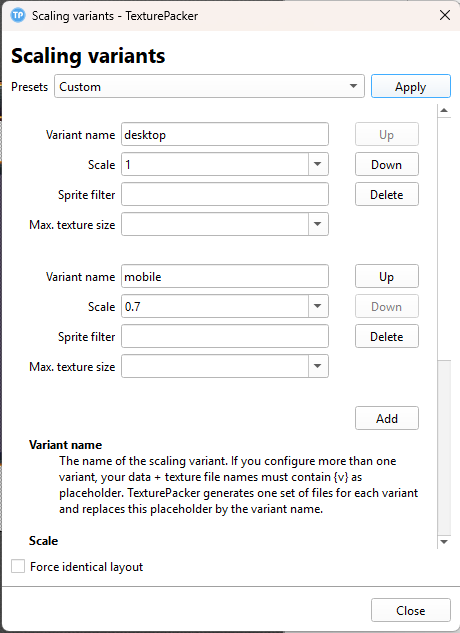
Scaling Variants Settings
Scaling Variants allow you to export multiple resolution versions of the same atlas (e.g., desktop vs. mobile).
Setup Steps
- Open the Scaling Variants panel
- Set Preset to
Custom - Click Add to create new variants
| Variant Name | Scale | Suffix |
|---|---|---|
| desktop | 1.0 | (none) |
| mobile | 0.7 | @0.7x |
Example Scaling Variants
Export Output
When exporting, TexturePacker generates:
.png— Sprite atlas image.plist/.json— Metadata with frame coordinates and dimensions
Example: